In this video update, there’s a lot happening! The most exciting thing was seeing the four doors on the ground floor change to windows. And throughout the house, the progress was visible everywhere we looked.
What You See in the Video
- Watch as the doors get changed to windows
- See how we saved historical elements during these changes and what we decided for the look on the outside of the house.
- Tour the rest of the house to see the electrical and plumbing roughed in, the new wardrobe room, and the new steps connecting our bedroom to the living room.
The Story Behind-the-Scenes
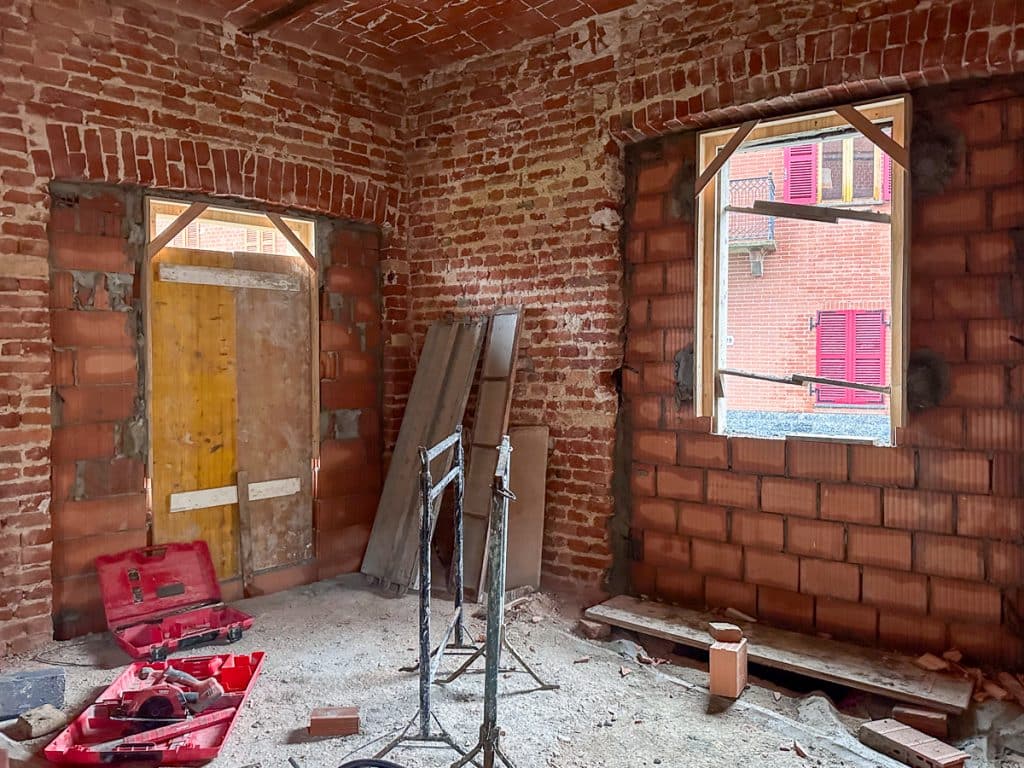
The day the bricklayers arrived to transform those four old doors on the ground floor to windows was totally unexpected. Sure, I’d seen the false frames waiting in the entryway but they’d been there a while and I wasn’t sure of the exact day the work would start.
So imagine my surprise as I drove toward the house one morning and could see one door completely removed and one guy working on a ladder. My little manual Fiat nearly stalled out when I stomped on the gas to get to the house 10 seconds quicker and not miss anymore of this exciting milestone!
Bricking shut and creating the window openings on the inside was easy enough. The tricky part was outside because the facade of the house was built with an antique brick that isn’t made anymore. Finding them would have been impossible. And even if we had, the price would have been too much. So, we made the decision to go with a yellow plaster inset to match an existing part of the yellow facade that you don’t see in the video.
My Italian continued to improve little by little throughout the renovation. But this was the first moment where I felt I had a COMPLETE conversation with the bricklayer about this yellow plaster inset and the difficulty in finding the antique bricks. It helped that he was very kind and patient. But I walked away from that exchange feeling so accomplished! Too bad I only spoke “construction Italian” and didn’t yet have the language skills to truly express my appreciation.
On the top floor, the builder recommended that we make a small opening as an access point to the roof on one side of the house. There already was an opening on the roof itself but you’d have to be a daredevil or acrobat to get there. With the wall open, and a future door to seal it, we’ll be able to easily check the roof if we’re having problems.
We also got word from the windowmaker that all of the existing windows could be restored and space created to give all of them double-paned glass. If you saw what some of the windows looked like (cracked wood, broken glass), you’d be as happy and surprised as I was! The geometra didn’t think it could be done but the local friends who recommended the windowmaker raved about him and that was enough for me.
Where To Next?
See all the renovation updates in order by heading back to this renovation journey page.
Or watch more now using the navigation links below.
Previous update: Cantina Tour: Wine Tank Room
Next update: Renovation Update Part 10: Plaster & Subfloor Starts